Sunday, June 30, 2024

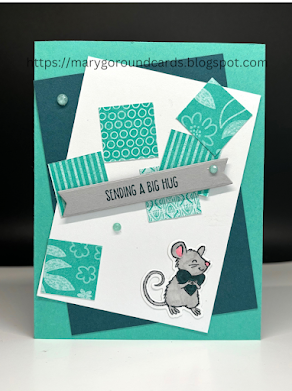
Random Squares Layout

 Random Squares Layout


Stampin' Up! Supplies Used
Paper:
  • Shy Shamrock: 8-1/2" x 5-1/2", scored at 4-1/4"
  • Pretty Peacock: 3-1/2" x 4-3/4"6
  • Basic White: 4" x 5-1/4", 3-1/4" x 4-1/2", scrap
  • Smoky Slate: scrap
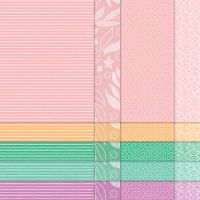
  • In-color 6" x 6", Designer Series Paper: Six 1" x 1" squares, 4" x 5/8"
Ink, Stamps and Dies:
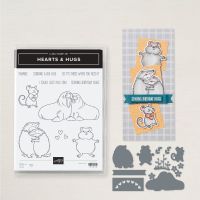
  • Hearts and Hugs Bundle (stamp set and dies):
  • Momento Black Ink Pad
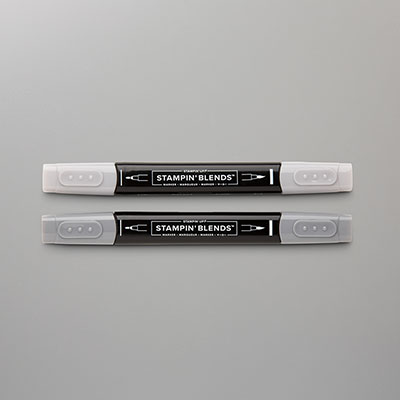
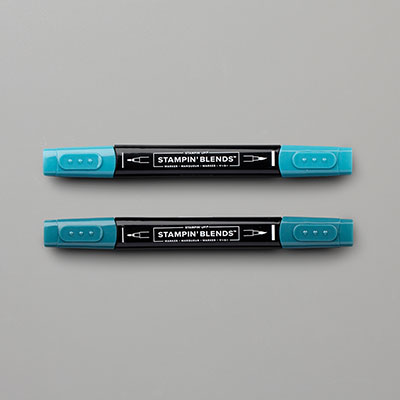
  • Stampin' Blends Markers: Pretty Peacock, Smoky Slate and Pretty in Pink
Other:
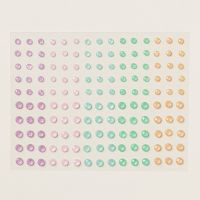
  • 2024 - 2026 In-color Shimmer Gems
  • Multipurpose Liquid Glue
  • Stampin' Dimensionals
Directions
  • This design is quite versatile. The random design makes it easy to use different colors, papers and focal points.
  • Stamp, color and die cut the animal or focal point of your choice. Below find a sample that uses a flower bouquet from the Country Flowers bundle. 
  • Glue the Pretty Peacock mat on the card front at an angle. Then add the 3-1/4" x 4-1/2" white mat at an opposite angle. 
  • Dry fit the squares and mouse before glueing them down. Use a variety of patterns from the Designer Series Paper pack. Put the mouse on last. It can be on Stampin' Dimensionals if desired.
  • Die cut and stamp the banner. Add it to the card using Stampin' Dimensionals. Add three coordinating In-color Shimmer Gems.
  • Finish off the inside of the card with a DSP strip and sentiment on a Basic White panel.
Here is an alternate sample. It uses Petunia Pop, Misty Moonlight and Granny Apple Green.
Need supplies? Connect to my online Stampin' Up! store here: https://marythiel.stampinup.net

Click on any of the pictures below to see details about the products used in this card. The link will go directly to my online store.

Product List

Friday, June 21, 2024

Thoughtful Journey Sympathy

 Thoughtful Journey Sympathy Card

Stampin' Up! Supplies 

Paper:
  • Basic White Thick: 8-1/2" x 5-1/2", scored at 4-1/4", scrap
  • Blueberry Bushel: 4-1/8" x 5-3/8", scrap
  • Thoughtful Journey Designer Series Paper (DSP): 4" x 5-1/4"
Stamps, Dies and Ink:
  • Unbounded Love Bundle (includes stamps and dies)
  • Under the Moon Stamp Set
  • Night of Navy Ink Pad
Other:
  • Stampin' Dimensionals
  • Multipurpose Liquid Glue
  • Iridescent Pearls Basic Jewels
  • Wink of Stella Glitter Brush
Instructions
  • Stamp the sailboat and dolphins onto the DSP
  • Glue the DSP to the Blueberry Bushel layer. Add this double layer to the card front with Stampin' Dimensionals.
  • Die cut the label. Stamp the sentiment toward one end. Shorten the label by placing the die so that only one end will be trimmed.
  • Die cut a Blueberry Bushel label. Cut a section out of the middle. Glue each end piece under one end of the white label. The white label now has Blueberry Bushel ends. Glue the new label to the card.
  • Add three Iridescent Pearls Basic Jewels
  • Add Wink of Stella to the more washed-out sections of the water.
Watch this short video to see how to shorten a label. 

Click on any of the pictures below to see details about the products used in this sympathy card. The link will go directly to my online store.

Product List
Friday, June 14, 2024

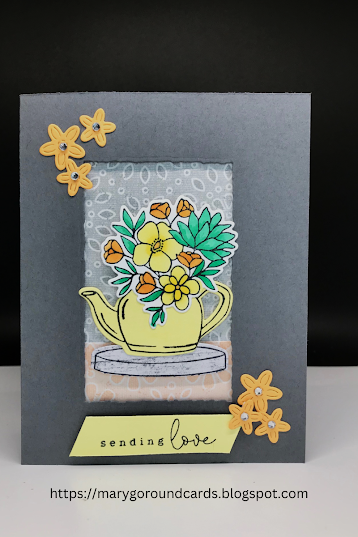
Country Flowers

 Country Flowers

Stampin' Up! Supplies

The paper:

  • Basic Gray: 5-1/2" x 8-1/2", scored at 4-1/4"
  • Lemon Lolly: scrap
  • Shy Shamrock: scrap
  • Peach Pie: scrap
  • Basic White: 4" x 5-1/4", 3" x 4", scrap
  • Country Lace Designer Series Paper:  3" x 4", 1" x 3", scrap
Stamps and Ink:
  • Country Flowers Bundle (stamp set and dies)
  • Momento Black ink pad
  • Stampin' Blends: Peach Pie, Lemon Lolly, Shy Shamrock
Other:
  • Mini Stampin' Dimensionals
  • Multipurpose Liquid Glue
  • Rhinestone Basic Jewels
  • Deckled Rectangle Dies
  • Wink of Stella Glitter Brush
The Instructions
  • Die cut an opening in the front of the card with the 2-1/4" x 3-1/2" Deckled Rectangle Die
  • Stamp flowers on a scrap of Basic White cardstock. Die cut and color with Stampin' Blends.
  • Stamp the teapot on a Lemon Lolly scrap and die cut.
  • Stamp the top of the stool on a scrap of Country Lace DSP. Die cut and trim off the legs of the stool.
  • Die cut flowers from a scrap of Peach Pie cardstock.
  • To make the background for the teapot, glue the large Country Lace DSP rectangle onto the Basic White rectangle. Then glue the smaller DSP piece at the bottom of that.
  • Place Mini Stampin' Dimensionals on the back of the window opening around the edges. Attach the background piece there.
  • Brush Wink of Stella on the teapot. Glue the teapot, flowers and "platter" together. Place in the window opening with Stampin' Dimensionals.
  • Stamp a strip of Shy Shamrock with a sentiment. Cut the ends at an angle. Adhere with Stampin' Dimensionals.
  • Glue flowers near the window corners. Add Rhinestone Basic Jewels to the flowers.
  • Stamp the inside piece as desired and adhere.
This alternate card uses Melon Mambo (#153112), Granny Apple Green (#154885) and Pumpkin Pie (#154897) Stampin' Blends and Melon Mambo cardstock (#115320).


Click on any of the pictures below to see details about the products used in this Country Flowers card. The link will go directly to my online store.

Product List

Friday, June 7, 2024

Hexagon Adventurous Sky Layout

 Hexagon Adventurous Sky Layout

Stampin'Up! Supplies

The Paper:

  • Basic White Thick: 5-1/2" x 8-1/2", scored at 4-1/4"
  • Copper Clay: 4-1/8" x 5-3/8"
  • Take to the Sky Designer Series Paper: five hexagons of various designs
Stamps and Ink:
  • Adventurous Sky Stamp Set
  • Mossy Meadow Ink Pad
  • Copper Clay Stampin' Blends
  • Mossy Meadow Stampin' Blends
Other:
  • Heartfelt Hexagon Punch
  • Industrial Trinkets
  • Baker's Twine Essential Pack
  • Multipurpose Liquid Glue
  • Stampin' Dimensionals
  • Mini-Glue Dots
Instructions
  • Punch five hexagons from five post-it notes leaving a bit of sticky on each hexagon. With the post-it hexagons, do a dry fit on the card front to see where each hexagon will go. 
  • The center, front hexagon is attached with dimensions. The others are glued on. Trim the edges of the overhanging hexagons.
  • Adhere the Copper Clay layer to the front of the card.
  • Punch the hexagon opening in the Copper Clay layer where to white hole is. This can be easily matched by punching from the inside of the card front.
  • Stamp a sentiment in the opening using Mossy Meadow ink.
  • Add three Industrial Trinkets using mini-glue dots.
  • Color two strands of white baker's twine. Color one with Copper Clay and one with Mossy Meadow. Tie a bow and attach it with a mini-glue dot.
  • Add a few partial hexagons to the edges of the inside of the card.

Here is an alternate card using the exact same layout. This sample uses Winter Meadow Designer Series Paper (#162133) and Neutral Adhesive Backed Sequins (#161627). The Lost Lagoon ribbon is retired, but another ribbon can easily be substituted. The sentiment is from the Layers of Beauty stamp set (#163514).
 
Click on any of the pictures below to see details about the products used in the airplane card. The link will go directly to my online store.

 Product List
Humble Home Thank You Card

 Humble Home Thank You Card Stampin' Up! Supplies The Paper: 2024-26 In-Color 6" x 6" Designer Series Paper: 4" x 5-1/4&q...

Popular Posts Title